Yirggzmb's Stuff
Topic: Tiny Life
Back to Main - Back to Tiny Life
Tiny Life Map Creation Information
This is partially intended as a reminder page for myself as well as a useful resource for the community
Useful Links
Getting Started
Creating a map is pretty easy. They're essentially specially exported save files, which means you create them in game using the same tools you would in normal play.
- Press F1 to bring up the debug/cheats box
- Enter the cheat "EditWorld"
- Create a new world and name it whatever you want. The name can change later. It's recommended to choose the "Empty Map" template as the map. Do not add more than one map to this save.
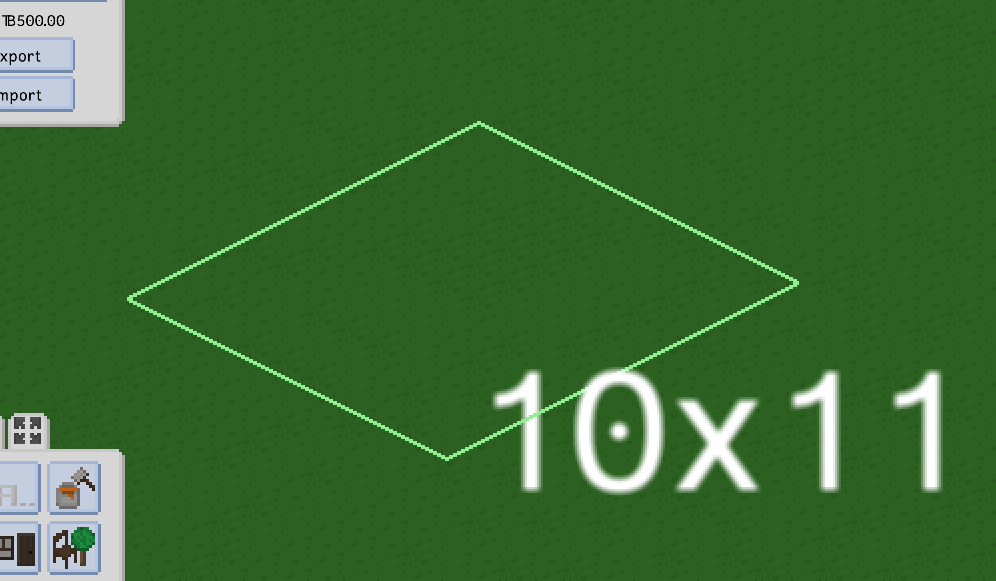
- Use the cheat "ResizeWorld [width][height]" to give yourself more or less space, as desired. Refer to the links above for more detail on this cheat, as well as the related "MoveWorld".
- Use the cheat "ShowNonBuyable" to be able to place things like roads or powerlines. "IgnorePlacementRules" may be useful as well. Refer to the links above for more detail here.
- Click on a lot (empty map only has the one) and choose "Build"
- Now start building your map! The EditWorld cheat allows you to place things anywhere on the map, not just the selected lot. You will also have access to a tool that will allow you to create new lots.
Making Backups
While it may seem like a waste of time, I highly recommend taking regular backups of your map in progress. This game is still Early Access and it's genuinely just better safe than sorry. If you do this, you'll probably never need those backups, but if you don't then you will. Sorry, that's just how life goes.
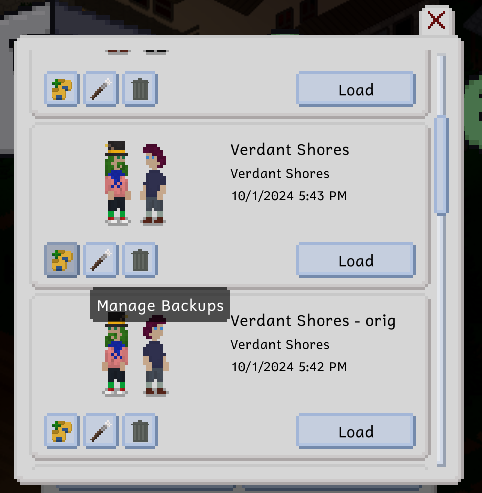
- From the main menu, click Load Game
- Find your save and click the Manage Backups button. This button looks like two folders and a green plus sign.
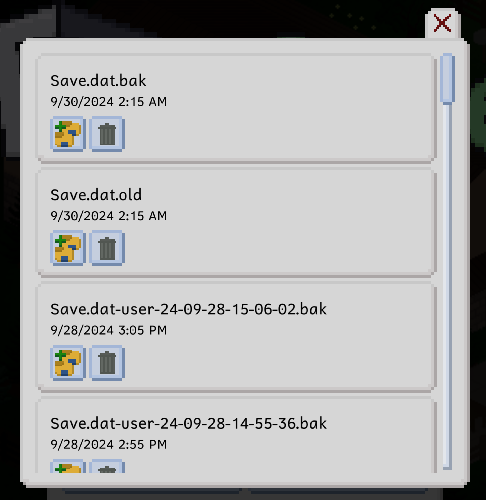
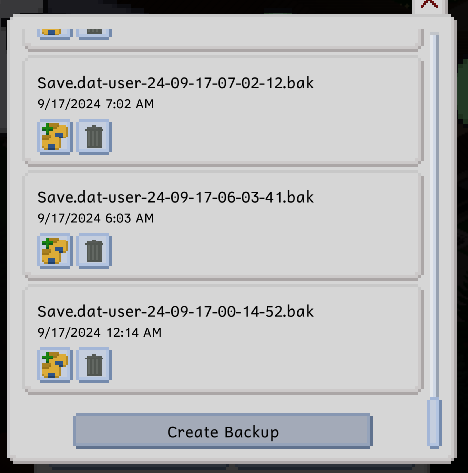
- Scroll to the bottom if necessary, and then click Create Backup
- You can also use this screen to restore a backup if you do find you need to
Another option is to create backups more manually, locating the folder for your save and making a copy of it somewhere else.
Lot Creation
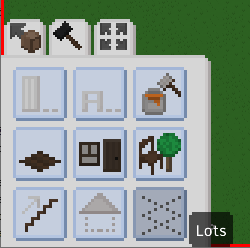
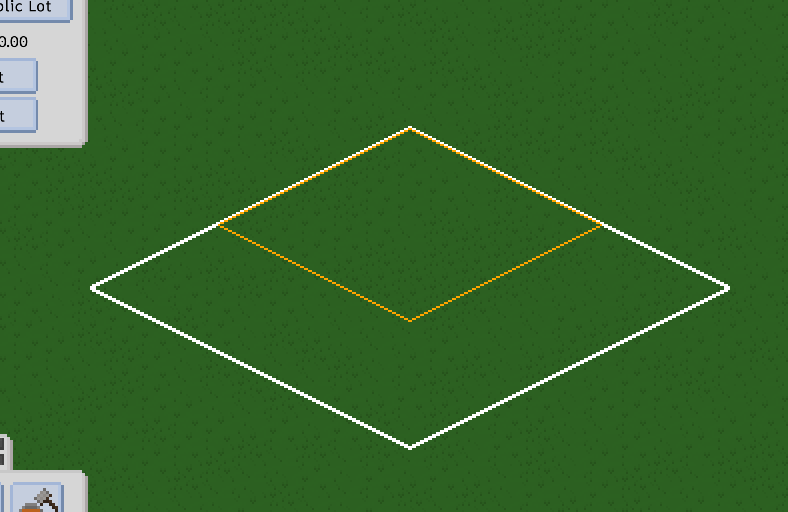
Having EditWorld enabled allows you to place and remove lots. Simply select the tool and drag out a rectangle where you would like a new lot.
To remove a lot, make sure the tool is selected, hold ctrl, and drag a rectangle over the lot. The edges of this rectangle MUST exactly match the edges of the lot you wish to remove. Lots cannot be removed if there is a family living on it. Lot creation and deletion cannot be undone with ctrl-z.
Deleting the lot with the lot tool should not delete furniture or walls, however if your removal rectangle does not match the edges of the plot, it WILL, so be careful. Lots should never overlap, and it's generally advisable to leave at least one tile of space between them.
While EditWorld allows you to make changes to lots that you do not currently have selected, I personally think it's generally advisable to leave that for small changes and to actually edit the lot normally if you wish to do large ones. The game will not show the tile grid for anything other than the lot it thinks you're editing, and it's very easy to accidentally put things on the wrong floor. Editing the lot normally also allows you to see things like lot requirements, and to give it a name.
Also, just as a note, the game will not allow you to back out to the household selection screen unless the lot you are currently in fulfills the lot requirements and has a name. If you're not sure what the lot is going to be yet, or if it's just a dummy one to allow you to do terrain editing elsewhere, the easiest thing to do is to make it a "Misc Public Lot" which has no requirements.
Assorted lot notes
Just some general information on houses and other lots
- All houses are required to have a mailbox and an outdoor trashcan. The outdoor trashcan can be any style of trashcan, as long as you place it outside.
- You can create corner counters, however Tinies don't seem to be able to actually interact with appliances placed there. It's advisable to instead use that counter for decorations, such as flower vases or decorative jars.
- Window curtains can be hung on any wall, even if there's a door there. And they do not block a Tiny's progress when walking through them. My Verdant Shore map uses this for both shower curtains and tent flaps.
- Roofs don't actually have to be on top of walls. They can be placed pretty much anywhere. Verdant Shores uses this for both dumpsters and piles of hay on the farm.
- In general, don't be afraid to be creative with usage of items. Just because the item name is "pile of magazines", it doesn't mean you can't make both of its colors white and put them on a table to look like mail instead. Or litter on the ground outside.
- Furniture that is "attached" to another item effectively becomes part of that item. Especially notable for tables and chairs as, normally a chair takes up a full tile and will block walking. But attaching the chair to a table makes it part of the table. Visually the chair is on a tile, but it does not block walking progress and you can actually place other furniture in the tile that it appears the chair exists in! This is good to remember when working in tight spaces.
- In order to qualify as a "starter home", the entire worth of the lot must be under $30,000.
- Afaik, there's no way to get rid of a gravestone once you have either placed one from the debug furniture list, or a Tiny has died. Plan ahead and maybe use placeholder objects until you're sure, if you intend to use gravestones in your world. (Potentially you could move gravestones to an otherwise empty lot, and then import a lot on top of it. But I've never tried it and it's just a good idea to be careful with these)
Households
Households are created the same as you would in normal play. You can create them in the spot where you'd like them to live, or you can create them somewhere else and export/import them when you're ready. Because your map is a living save and there's no way to turn off ai for anything other than the household you are currently in, it's a good idea to do as much as you can without advancing the in game clock. Tinies love to randomly grill and leave plates everywhere. Below you will find a list of cheats you may find useful for this. As always, refer to the official links above for more details.
- "EditPerson" will bring up the full household editor, allowing you to change the entire household as if you were making them the first time.
- "Skill [name] [level]" can be used to give Tinies skills without actually having to go through the process of learning them.
- "AddJob [name] [level]" can be used to assign jobs. Job level uses 0 indexes, so the lowest level of a job is level 0 and the highest level is actually level 9.
- "RemoveJob [name]" can be used to then remove a job from a Tiny.
- Because AddJob won't replace an existing job, you'll need to remove the existing one first if you'd like to change a Tiny's job or adjust the level. This can also be used on children! I have not tested what happens to children who "drop out of school" permanently, but you can use this combo to change what grade they're currently getting.
- "Friendship [NameWithNoSpaces] [level]" will set friendships. Level must be a number between -1 and 1, with 0 being "acquaintance". For map creation, you are only interested in the actual name of the friendship level (ie "friend", "good friend", "disliked" etc) as the export function will set all relationships of each level to the same value.
- "Romance [NameWithNoSpaces] [level]" functions identically to Friendship, except for the romance bar
- "LifeGoal [goal] [stage]" will assign the stated goal and level to the selected Tiny.
- "LifeGoal Advance" will increment a goal by one. This actually can be used to complete a goal entirely! Simply assign the goal, either via the previous cheat or with the button in game, and then run this cheat until the game tells you that they've completed it. This can be useful if you'd like a Tiny to have a specific reward personality, such as a very very rich guy already having the Filthy Rich trait, or creating adults who have childhood reward personalities.
- "Money [amount]" will directly set the household funds. When exporting the map, this value will be rounded to the nearest 1000 (as far as I can tell)
- "FreeLots" will allow you to move households into lots without affecting their money. Useful when you want to put them into a more expensive house.
- "ShowDebugActions" will let you teleport to locations to take care of things that cannot be taken care of with a cheat, shortening the time the game must be unpaused.
There are still a few things that must be done with the game unpaused. Use of ShowDebugActions and teleporting will minimize the time required though.
- Dating - At least afaik, there is no cheat nor debug action to set two Tinies as "dating", which is the highest level of commitment currently in the game.
- First Kiss - Similarly, a first kiss must be done legit.
- Claiming beds - The export will keep whose bed is whose, but the only way to assign it is to have a Tiny sleep in the bed. Simplest way is to just teleport next to it and unpause long enough for them to get in. It does not matter if you leave them sleeping or not, as the export resets everyone's positions and actions.
- Death - The only way to get gravestones that have the name of a person on them is to actually kill someone. While you can use the "Die" cheat or use the same debug action, you still have to wait out the death animation. Both of these methods of death result in a reason of "Inexplicable Reasons". If you want a Tiny killed by other means, you'll have to do that legit in game.
- Baby reward personalities - Tinies are assigned these when they grow up from baby to child, if they have the correct skills. The only way to get these is to create a tiny as a baby, give them the required skills, and then age them up. The cheat "AgeUp" will trigger this age transition immediately, however you still need to unpause the game to allow the animation to roll. Once you have done that, you can then EditPerson and make them the age you actually want them, fix their appearance, etc.
What actually gets kept on export?
So when exporting, some things are kept and some are not. I've touched on a few of them above, but here's a list that I'll probably keep adding to as I test (or remember) stuff
- Skills - Known skills are kept at the level they are set to, but any progress towards the next level is lost
- Relationships - Relationship levels (ie "friends", "good friends", "disliked", "love interest", "soulmates", etc) are kept, but the exact value is reset to a default value for that level. The status of "Dating" is likewise kept.
- Relationships and Family Ties across lots - This is kept, though I've had some weirdness with duplicate relationships when I have an exported version of a Tiny in my exported households folder when creating a new world from a map that also contains that Tiny. This is harmless, just a bit odd and something to keep in mind. It shouldn't affect people who only have the map.
- First Kiss - If two Tinies have already shared their first kiss, this is kept on export
- Bed Claims - Beds that have been claimed will be remembered, which can be useful if you wish to make very clear which bedroom belongs to which household member
- Daily Job Task - The export will actually remember the current progress on today's job task, such as kids doing homework or firefighters working out. Keep this in mind if things such as "This kid is doing badly in school" is relevant to your household story. If you need to reset progress on a task, you can remove the job and re-add it before export
- Job Status - Tinies that have jobs will keep their job and level. However, Tinies can pick up jobs randomly if there's no one in the lot with one. It's a good idea, then, to make sure there's at least one Tiny with a job in each house if you would like to be in control of whom and what.
- Gravestones - Gravestones that are created from an actual Tiny will retain the name of the Tiny who died and the reason.
- Dead Tinies - Tinies that have been killed to create a gravestone will still retain some information. They can be brought back to life by later players with the cheat "Revive [NameWithNoSpaces]", so it may be worth thinking about giving them an actual character just in case. They will keep their skills, appearance, and description. The seem to lose any relationships to other people in the map. More testing is needed on things like jobs and age, though it is reasonable to assume that they're probably kept.
- Needs and Emotions - On export, every single Tiny will be reset to baseline health and emotions, as if you had just moved them into the lot
- Location - On export, every tiny in a lot will be placed outside near the front, again as if you had just moved them in
- Lot Staff (including mail carrier and trash collector) - These are kept, with a caveat. See next section.
Lot Staff
Lot staff are the people who work in your cafes and libraries, etc, as well as the mail carrier and trash collector. These can be preassigned, but they are tied to name of the map itself! Which means you need to export your map at least once before assigning them. Below are the steps to ensure it works.
- If you haven't already, rename your save file to the name you want your map to have.
- Open the save and follow the steps for exporting your map.
- Rename this save file something else.
- Create a new world. Select your map and give the save file the same name as the map.
- This new save is now the save you'll be editing to continue making the map. It is now safe to assign lot staff.
While I haven't run into anything specific, it's possible that other things could also be tied to the map name like this. Therefore, it's probably a good idea to follow these steps as soon as you're sure you know what you want to call the map. Please note that even if you know from day 1 what you want to call the map, you still have to export it at least once. Otherwise, the save file will still be tied to the Empty Map (or whatever map you chose when starting the save file).
These Tinies can have skills, personalities, and relationships like any other Tiny on the map. In fact, it's probably a good idea to actually give them some skills related to the job you plan to assign them to. A cafe staff member with no cooking skill will serve your Tinies terrible food, as an example. But who knows, maybe that's what you want. Staff are assigned from your list of exported households, so you'll need to create them along with the rest of the people in your town, and then export them.
Exporting your Map
Exporting a map is a simple process, though there is some manual work that needs to be done.
- Make sure the save file is renamed to the name you want the map to be. This can be done on the Load Game menu.
- Open your save
- Press F1 and enter the cheat "ExportCustomMap". Press enter and wait. The game will pause a moment while the system works.
- When it is done, open the folder where Tiny Life puts your saves and assorted exports. Your map JSON will be found in the Custom Maps folder there.
- Create a text file and name it "Map Name.txt". The official docs page gives the file name as "MyMapName.txt", but I found that I had to include spaces if my map name includes spaces. IE, "Verdant Shores.txt". In this file, write the text that the game will display when selecting a map. If you're still working on your map, this can be placeholder text as you can always change it just by changing the contents of the text file.
- Create the image that the game will display when selecting a map. The official docs say that it needs to be a 4:1 aspect ratio, and that the default maps use a size of 512x128. Personally, I see no reason to go larger than this. Might as well keep file size down. Save the image as "Map Name.png", similar to the text file above. Likewise, you can easily change this later, so it's ok to use a placeholder.
- Create a thumbnail for the Steam Workshop page. This is optional, but if you plan on sharing to the Workshop it's probably a good idea. This is also a png, square. More info on the official docs page, but in general you want to keep this kinda small. The docs give the file name as "MyMapNameSteamThumbnail.png", so in the case of Verdant Shore, my thumbnail was called "Verdant ShoresSteamThumbnail.png". It looks funny, but it worked, so I don't know what you can get away with here. This is not necessary for the map to load in game, so it's not important to do it right away even if you plan to later.
- Create a .zip file and put the map JSON, text file, and the image(s) into it. Name the zip to your map name. This is technically optional. The game can also pull up maps that are just floating free in the Custom Maps folder. But if you want to share the map, it's more practical to share a .zip file. Plus it's just neater.
- Worth noting that it's entirely ok if your map zip contains other files. Verdant Shores contains a readme text file, as well as a few bonus images for anyone who thinks to go in there.