Yirggzmb's Stuff
Blog
Back to Blog Index - Back to Main
Pink Puffball Plush Pattern - 2026-08-06
As a fair warning, this pattern has not been tested. It's my personal notes, rewritten into pattern language. Some of it is a bit chaotic and I apologize in advance. It's meant as a starting base for people to jump off from - adapt or add to it as makes you happy.
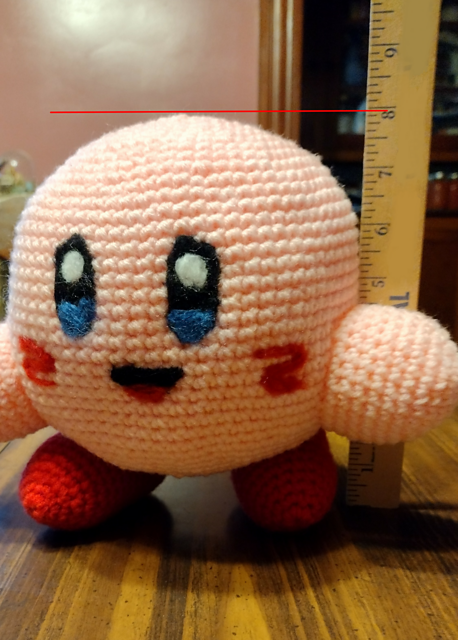
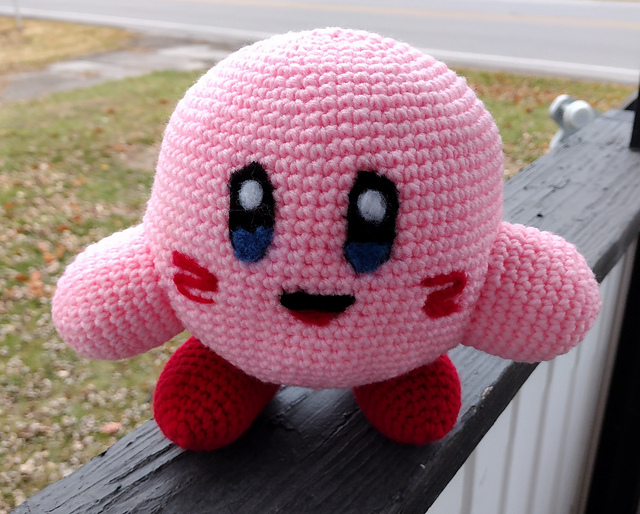
Materials
- Aran weight yarn in body color (I used Red Heart Super Saver in baby pink)
- Aran weight yarn in feet color (I used Red Heart Super Saver in one of the red shades)
- 5mm hook, or whatever needed to match gauge/tension
- Stuffing (quite a bit)
- Whatever materials you prefer for making a face
- Scissors, yarn needle, measuring tape, etc
Gauge
Strictly speaking, gauge is not essential for a stuffed toy. You want a fabric that is fairly solid. Modern patterns often aim for an extremely dense gauge. I personally prefer something a bit looser. If you do not care about the exact size of your plush, use whatever yarn and hook combo makes you happy. If you want one that is 20cm/8in tall like mine, you'll want to match the following gauge as transcribed by my notes:
- Completing the first 12 rounds of the body should give a disc 6 inches across (15.24 cm)
- First 5 rounds = 2 and 7/8 inches across (approx 7.3 cm)
- Approximately 13.5 stitches to 4in/10cm
- Approximately 17 rounds to 4in/10cm
My notes also list:
I'm gonna be real, I'm not sure how this all works simultaneously, but the 6in body disc is the most important value
Abbreviations
Ch - Chain
Sc - Single Crochet (american terms)
Sc2tog - Single crochet 2 together (preferred method)
Inc - Work 2 single crochet into one stitch
Slst - Slip stitch
Slst2tog - Slip stitch 2 together (Insert hook under front loops of next 2 stitches. Yarn over and pull through both stitches AND the loop on your hook)
St - Stitch
Fo Invisibly - Finish off invisibly (example)
Note - Pattern is made in spirals, without joining. There is no chaining at the beginning of a round. Use a stitch marker or scrap of yarn to mark the end/beginning of the round
Body
Starting at the top of the body:
Ch 4, slst into the first chain you made to form a ring (this step can be replaced with any center out method you prefer)
- Work 6 sc into ring
- 2 sc into each stitch [12 sc total]
- (Sc 1, inc) repeat until end of round [18 sc total]
- (Sc 2, inc) repeat until end of round [24 sc total]
- (Sc 1, inc, sc 2) repeat [30 sc total]
- (Sc 1, inc, sc 3) repeat [36 sc total]
- (Sc 3, inc, sc 2) repeat [42 sc total]
- (Sc 3, inc, sc 3) repeat [48 sc total]
- (Sc 6, inc, sc 1) repeat [54 sc total]
- (Sc 6, inc, sc 2) repeat [60 sc total]
- (Sc 2, inc, sc 7) repeat [66 sc total]
- (Sc 10, inc) repeat [72 sc total]
Place an extra marker in this round to mark the end of the increases
Gauge note - You should now have a disc approximately 6 inches across. If it cups slightly instead of lying perfectly flat, that's fine. Squish it flat to measure, but slightly cupping will help the final piece look rounded and isn't anything to worry about. If it cups so dramatically that you cannot flatten it to measure, try a different hook size.
FYI Note, mostly for advanced crocheters - This is the same increase rate as your standard ball, but every few rounds we shift the location of the increase to limit how hexagonal the disc looks and to prevent the appearance of obvious wedges. If you can't be fussed with that, a standard increase pattern of 6 per round works just fine.
- Sc in each stitch around
Repeat this round 17 more times for a total of 18, or until the straight portion is just over 4in/10cm from the marker at the end of the increases
- (Sc 10, dec) repeat [66 sc total)
- (Sc 2, sc2tog, sc 7) repeat [60 sc total]
- (Sc 6, sc2tog, sc 2) repeat [54 sc total]
- (Sc 6, sc2tog, sc 1) repeat [48 sc total]
- (Sc 3, sc2tog, sc 3) repeat [42 sc total]
- (Sc 3, sc2tog, sc 2) repeat [36 sc total]
- (Sc 1, sc2tog, sc 3) repeat [30 sc total]
- (Sc 1, sc2tog, sc 2) repeat [24 sc total]
Stuff body about here, before the opening gets too small. - (Sc 2, sc2tog) repeat [18 sc total]
- (Sc 1, sc2tog) repeat [12 sc total]
- Sc2tog 6 times [6 sc total]
Cut yarn, finish off. Thread yarn through the tops of the remaining 6 stitches and pull tight. Secure and thread yarn tail inside body.
Adaptation note - If you'd like a rounder plush, you could try adding more increase rounds and working straight for shorter. Example, adding 4 increase rounds. You would then leave off about 8 plain rounds to get the same height, and do an extra 4 decrease rounds.
Arm (make 2)
Starting at the end of the arm:
Ch 4, slst into the first chain to form a ring
- 6 sc into ring [6 sc total]
- 2 sc in every stitch [12 sc total]
- (Sc 3, inc) repeat [15 sc total]
- (Sc 1, inc, sc 1, inc, sc 1) repeat [21 sc total]
- (Sc 2, inc, sc 3, inc) repeat [27 sc total]
- Sc in each stitch around
Repeat this round 5 more times for a total of 6 rounds worked without shaping - Sc 1, slst a couple stitches, cut yarn and fo invisibly.
Foot (make 2)
Starting at the front of the foot:
Ch 4, slst into the first chain to form a ring
- 6 sc into ring [6 sc total]
- (Sc 1, inc in next st, inc in next st) repeat [10 sc total]
- (Sc 1, inc) repeat [15 sc total]
- (Sc 4, inc) repeat [18 sc total]
- (Sc 2, inc) repeat [24 sc total]
- Sc in each st around
Repeat this round 11 more times for a total of 12 rounds worked without shaping - Sc 5, sc2tog 3 times, sc 6, sc2tog 3 times, sc 1 [18 sc total]
Stuff foot - Sc 3, sc2tog 3 times, sc 3, sc2tog 3 times [12 sc total)
- Sc2tog 5 times, slst2tog
Cut yarn, finish off. Thread yarn through the tops of the remaining 6 stitches and pull tight. Secure and thread yarn tail inside foot.
Stuffing note - If you would like your plush to stand, you may wish to weight the feet. Sew a cloth bag that will fit in the bottom of the foot and fill with poly pellets, or similar. Insert this bag into the bottom of the foot along with the stuffing
Assembly
Stitch arms to body in whatever pose you like. For my plush, I went with a fairly neutral pose where the top of the arms is at just about the center point of each side. Add stuffing before fully closing off the arm.
Stitch the feet to the bottom of the body. If you wish the plush to stand, place the feet on a level table and balance the partially completely plush on top. I find a slight V formation helps with balance. When balanced, mark the location of the feet on the body and stitch each one in place.
Add a face through whatever means makes the most sense to you. Some options:
- Felt stitched or glued to the body
- Embroidery
- Needle felting
- Safety eyes, attached at the stuffing stage of the body
For mine, all details are needle felted on. A note, if you go this direction, needle felting acrylic fluff onto acrylic yarn like I did is not permanent. It's fairly stable, but you can generally peel it off if you try. Probably best to avoid this for anything given to children. Needle felting wool roving onto wool yarn may be more sturdy. A thing I would like to try on future projects is stitching down felt shapes with thread, and then needle felting the edges a bit to meld them into the fabric